Recently, we returned some items to Bed, Bath & Beyond, which resulted in some nice in-store credit. We got some things we have been wanting or needing, but had a small portion left. Josh mentioned that I can take the remainder and I can figure out whatever I want to use it on. I have contemplated a lot of options, but one day it hit me. I wanted a Keurig coffee maker. I am a regular to caffeine (guilty), and I have been trying to limit the amount of actual soft drinks I drink due to the fact that even if I drink "diet" it still is not that ideal for me. I've also worked around the idea of iced coffee (which I LOVE iced coffee), but it required a lot of work (in the morning, I kinda get...lazy). I enjoy the flavor of coffee as long as it has FLAVOR to it, such as the milk/creamer or just if it is flavored coffee. What sold me on the Keurig is the LARGE SELECTION of k cups of coffee. (oh, also, should I mention that I REALLY do not know how to make real coffee? So, the idea of the k cups is perfect for me). With my in-store credit, the Keurig was at a reasonable price for me to justify it, so off I went! I also started with a flavor I have heard from friends/workers, Coconut Mocha and Chocolate Raspberry Truffle. I cannot mention how much I am love with this morning tradition!! I think so far, the Coconut Mocha is actually my favorite because even though it is a Medium roast compared to the Chocolate truffle which is a Light roast, the Coconut actually has more of a smooth flavor. I just add milk into my travel mug (which also calms down the scalding temperature, which is one of the reasons why I prefer Iced > Hot coffee) and I am all set! I am also open to many other flavors and ideas, if someone has them!!!
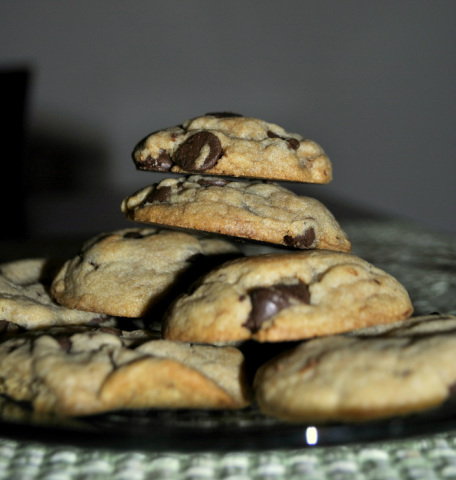
This morning, Josh and I spent time looking at pinterest for recipe ideas. We created a mixture of good ideas, including appetizers, dinners and desserts. We found a nice chocolate chip cookie recipe that looked insanely easy and insanely yummy.All I needed from the store was baking powder and cornstarch. These were two ingredients I have yet to add to my baking cabinet and were ones that I've never used in cookies before. So I was definitely curious to attempt a recipe using these!
Ingredients:
- 3/4 C unsalted butter, softened
- 3/4 C brown sugar
-1/4 C grandulated sugar
- 1 egg
- 2 teaspoons vanilla extract
- 2 C all purpose flour
- 2 teaspoons baking soda
- 1/2 teaspoon salt
- 1 C bittersweet chocolate chips
Directions:
1. Preheat oven to 350 degrees
2. Mixer with a paddle attachment, cream together butter and sugars until fluffy and light in color. Add Egg and vanilla and blend well.
3. Mix in flour, cornstarch, baking soda and salt in another bowl. Then add to stand mixer.
4. Stir in chocolate chips
5. Using standard size cookie scoop/tablespoon, drop dough onto baking sheet.
6. Bake for 8-10 minutes, until barely golden brown at edges
7. Remove from oven and let cool completely Do you have any exciting chocolate chip renditions?? I feel like there could be as many variations as there are days in the year!!
Thanks for baking along!
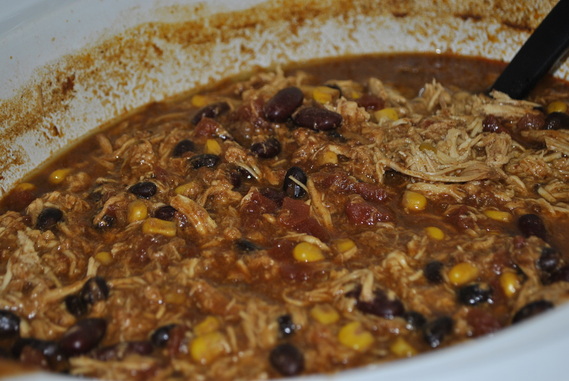
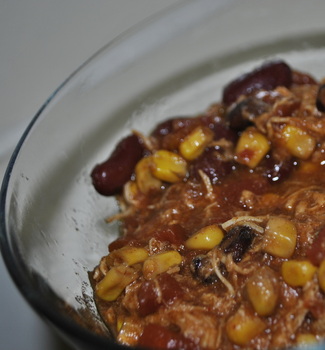
I was perusing through my pinterest recipe board, trying to find a recipe for dinner this week and stumbled across Crockpot Chicken Taco Chili. This recipe looked not only easy and delicious, but also had good nutritional facts with less than 250 calories per serving! This recipe is from a cute blog that has LOTS of healthy and easy recipes! Crockpot Chicken Taco Chili
Ingredients:
1 onion, chopped (I used minced dry onion and onion powder, as we dont care for the texture of onion in mixes)
1 16-oz can of black beans
1 16-oz can of kidney beans
1 16-oz can of tomato paste (I found 2, 8-oz cans of garlic flavored, YUM)
1 16-oz can of corn
2 14.5-oz cans of diced tomatoes and green chilies
1 packet of taco seasoning
1 tbsp of cumin
1 tbps of chili powder
2 Lg. chicken breasts, skinned
chili peppers (optional)
chopped fresh cilantro (optional)
I prepared all of this the night before, so that when I left for work in the morning, all I needed to do was pour the mixtures into the crockpot instead of wasting time opening up the cans, etc (It worked extremely well!).
Combine the black beans, kidney beans, corn, tomato paste, diced tomatoes and chilies, taco seasoning, cumin, chili powder and chicken into crockpot. Place chicken on top and cover. Cook on low for 10 hours or on high for 6 hours. Half an hour before serving, remove chicken and shred. I used another handy thought from pinterest, and placed my chicken into my KitchenAid mixer and turned the mixer on medium. This is a handy way to shred the chicken in a quick and efficient manor! Return the chicken to the chili and prepare to serve! I made instant rice to combine with my chili and added a spoonful of Lite sour cream (to tame the spices down a bit). Serving size: 10 oz
Prep time: 5 minutes
Calories: 202
WW points: 4
WW+ points: 5
Thanks for sharing!! Let me know if you have any other yummy crockpot recipes!!
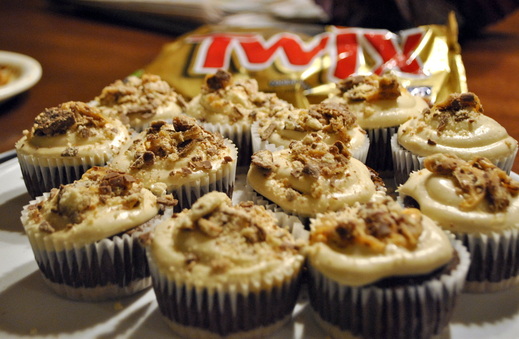
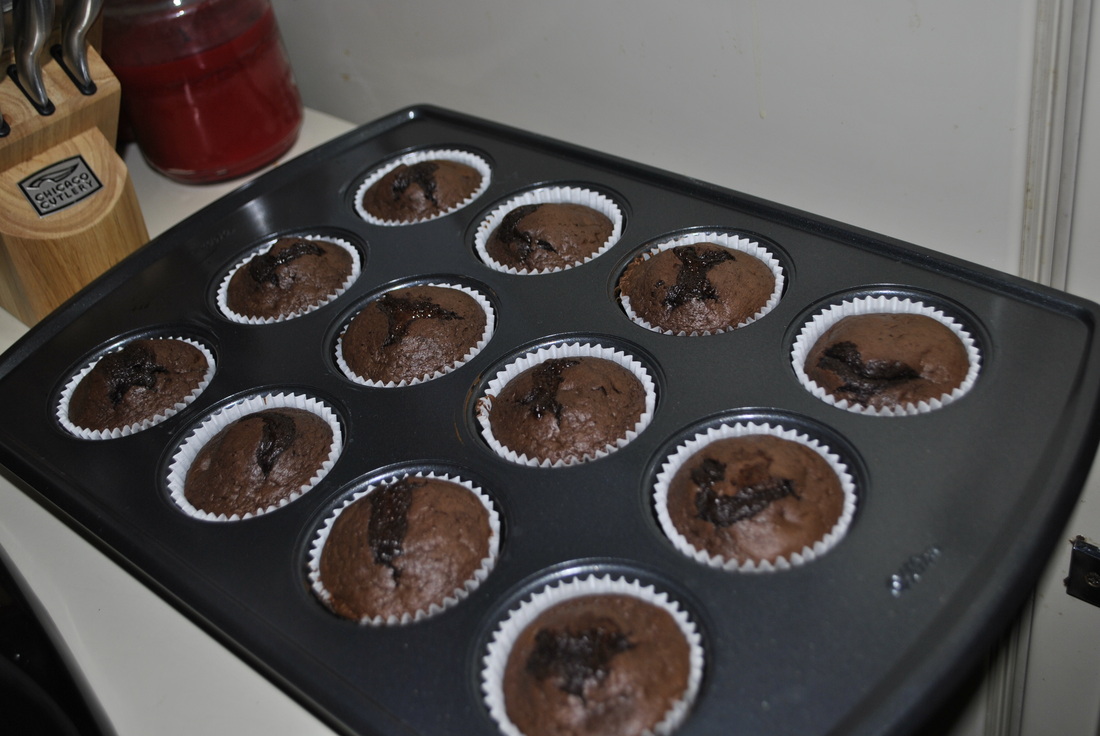
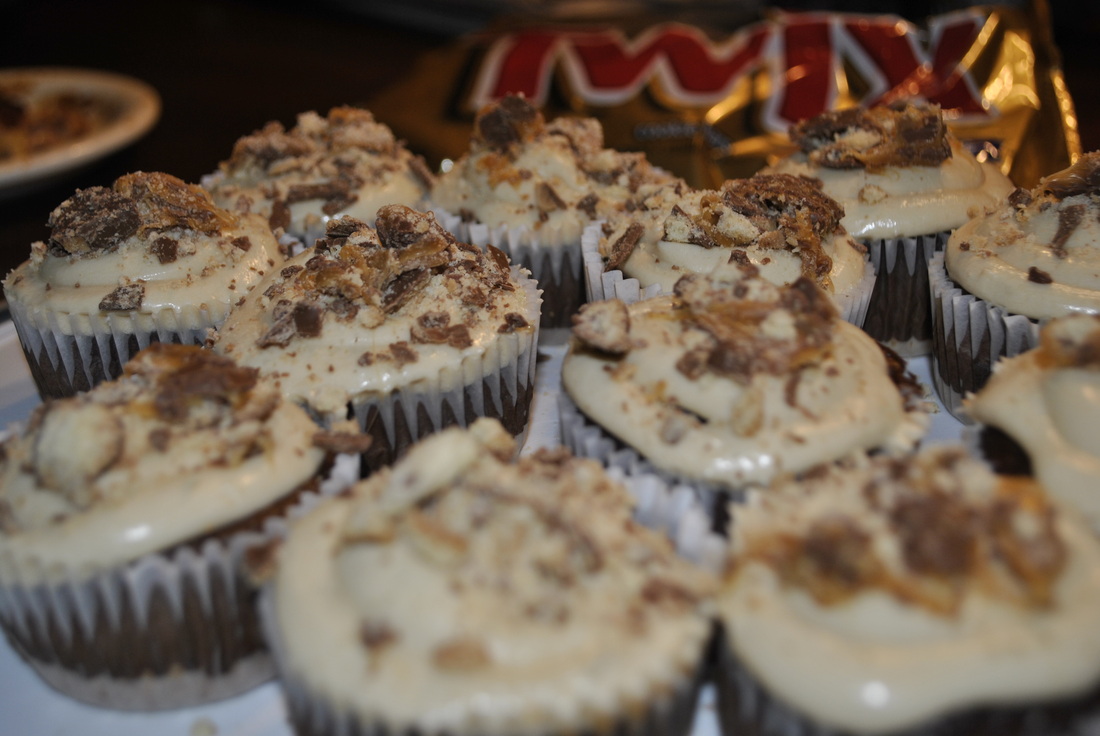
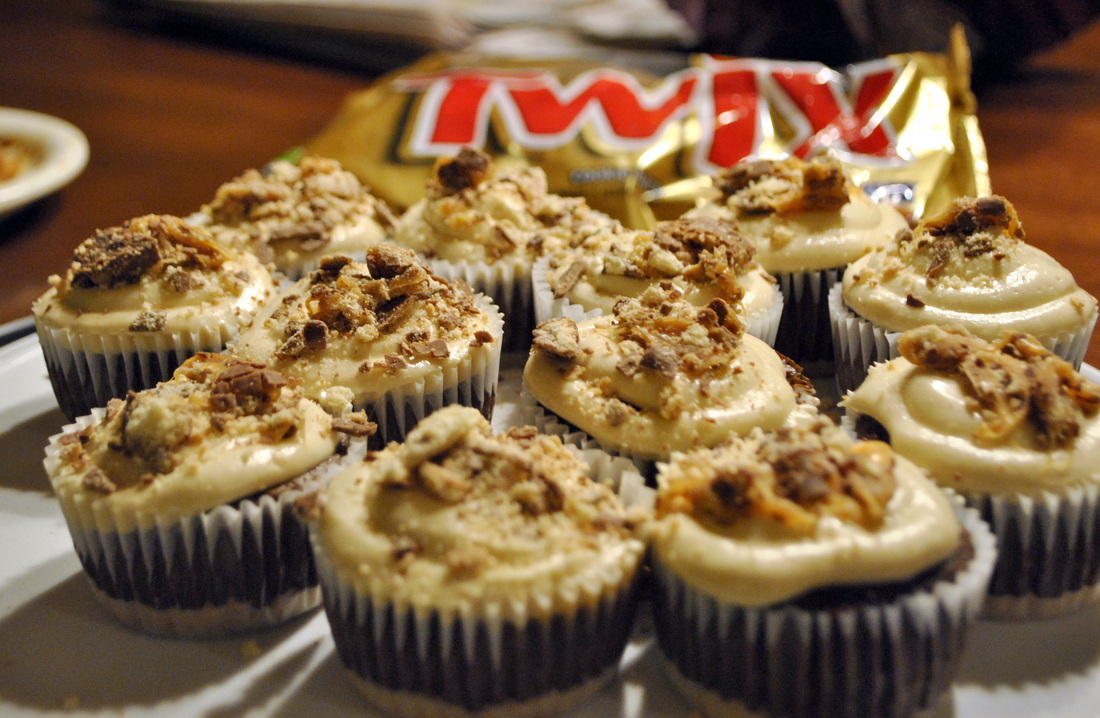
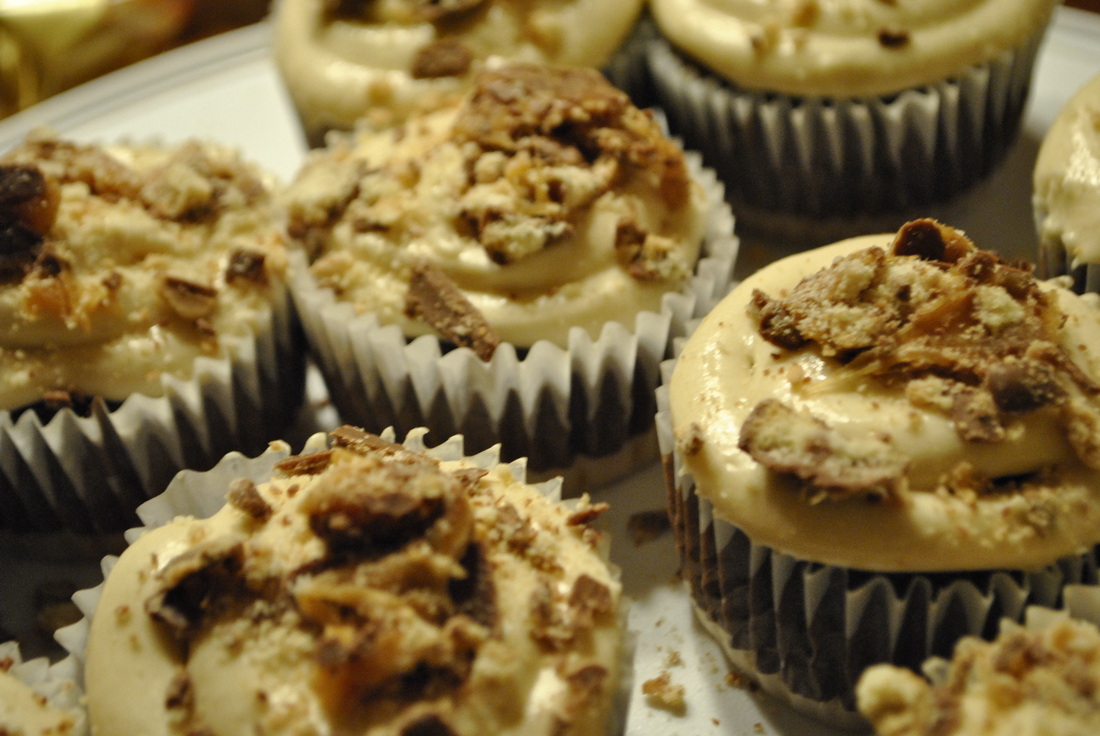
Josh had two of his friends come into town to surprise him for his birthday. All along, I was asking one of the guys what type of cupcake I should make. And, of course, a response from a typical guy was "umm...we dont need cupcakes." I took that response, and threw it out the window. I went onto Pinterest and searched for some cupcake recipes. I knew a simple cupcake was not going to do it. So, I searched for "Twix" cupcakes since Josh's favorite candy bars are Twix. And, of course, I stumbled across a delicious recipe...THANK YOU PINTEREST!!! So I started with this recipe Twix Cupcakes and went to the grocery!! Twix Cupcakes
Ingredients
1 box of chocolate fudge cake mix (using all the necessary ingredients: eggs, oil, water) 1 box of Jello chocolate fudge instant pudding 1 Cup sour cream 2 pkgs of Keebler Simply Shortbread Cookies ( I used 1 pkg)
1 jar smuckers caramel topping ( I used smuckers squeezable topping my second batch. WONDEROUS IDEA!!)
2 bags mini twix bars (I used 1 bag)Line your cupcake pan with liners and place the shortbread cookies in the bottom of each liner. Prepare the cake batter according to box directions. Add dry ingredients of instant pudding mix and 1 Cup of sour cream. Combine using hand held mixer until all combined. In each cupcake liner, fill cups 2/3 full with chocolate batter. Bake at 350 degrees for 15-18 minutes. Let cool completely and poke a hole into each cupcake center. Use caramel topping to fill hole in each cupcake. Do not overfill, but make sure the caramel rises to the top of the cupcake.
Caramel Buttercream Frosting
2 sticks unsalted butter, softened
2 tsp of vanilla
half jar or container of smuckers caramel topping
2 lb bag of powdered sugar
To prepare frosting, add melted butter and vanilla into mixing bowl. While mixing, add half of powdered sugar and remaining caramel topping into bowl. Continue mixing on medium to medium-high speed. Continue adding powdered sugar until desired thickness of frosting achieved. Frosting needs to be thick enough to not drip off of mixing beater. When frosting is at desired thickness, place into piping bag (or I use a ziploc bag and cut a hole at the tip) to pipe the frosting on the cupcakes. Crunch/pummel/demolish the mini twix bars (using meat tenderizer was a good choice) and sprinkle the mini Twix pieces onto the top of each cupcake. Serve and ENJOY! These turned out to be not only a huge hit with the kids, but the adults also LOVED them! And Josh's friend that told me we didn't need cupcakes...well, he had a few himself ;-)
I ended up making more batter and frosting to create as a Thanksgiving dessert. Needless to say, they were delicious the second time as well!!
Hope this inspires you to make some yummy treats!!
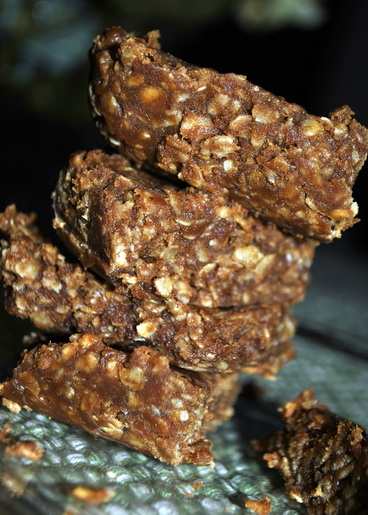
As the day went on today, I realized I was wanting some no bake cookies! I knew I had all the ingredients I would need, minus the oatmeal. But this was no problem, because I've also been wanting to get some oatmeal in attempts to make this fun recipe I found on Pinterest: Peanut Butter Banana Smoothie. I went to pick up some oatmeal so I could begin bringing back childhood memories!! This recipe is entirely easy and entirely simple to make. So, without further adieu, here is the recipe:
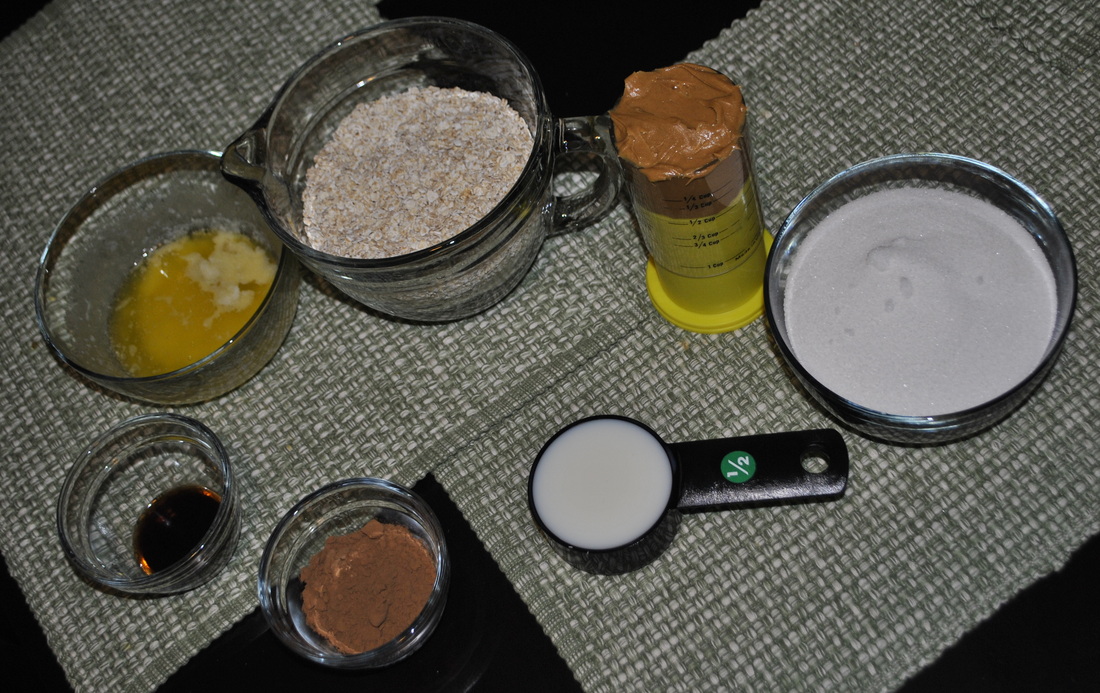
Bring-Back-the-Childhood-Memories No Bake Cookies
Ingredients:
1/2 Cups Butter
2 Cups Sugar
1/2 Cup Milk
4 Tbsp. Cocoa
1/2 Cup Peanut Butter
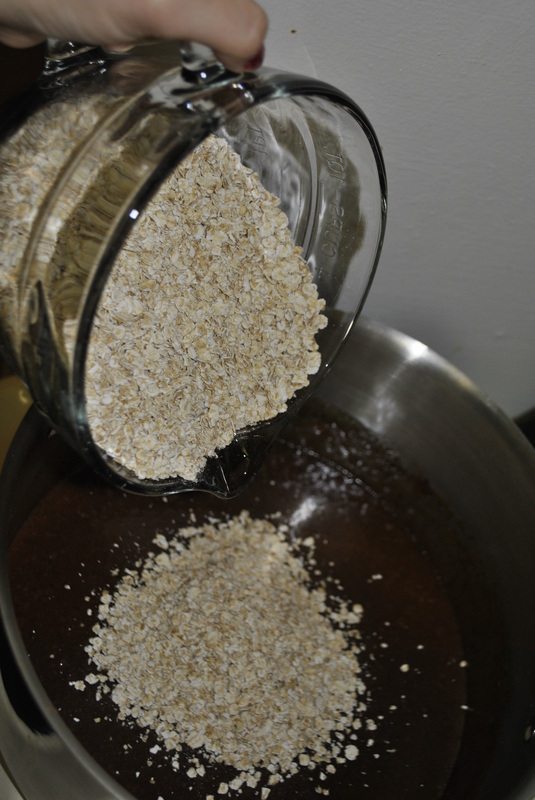
3 Cup Quick Cooking Oats
2 tsp. Vanilla
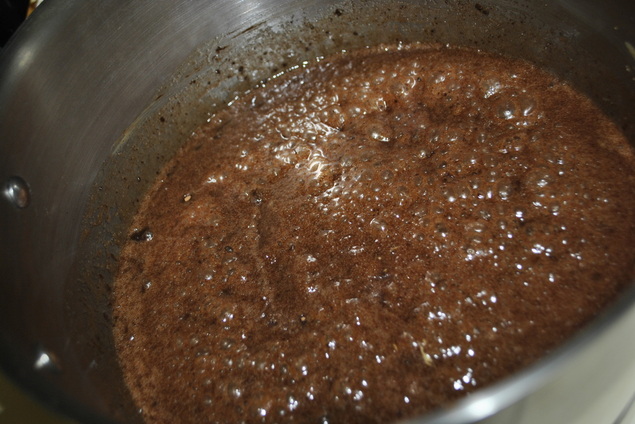
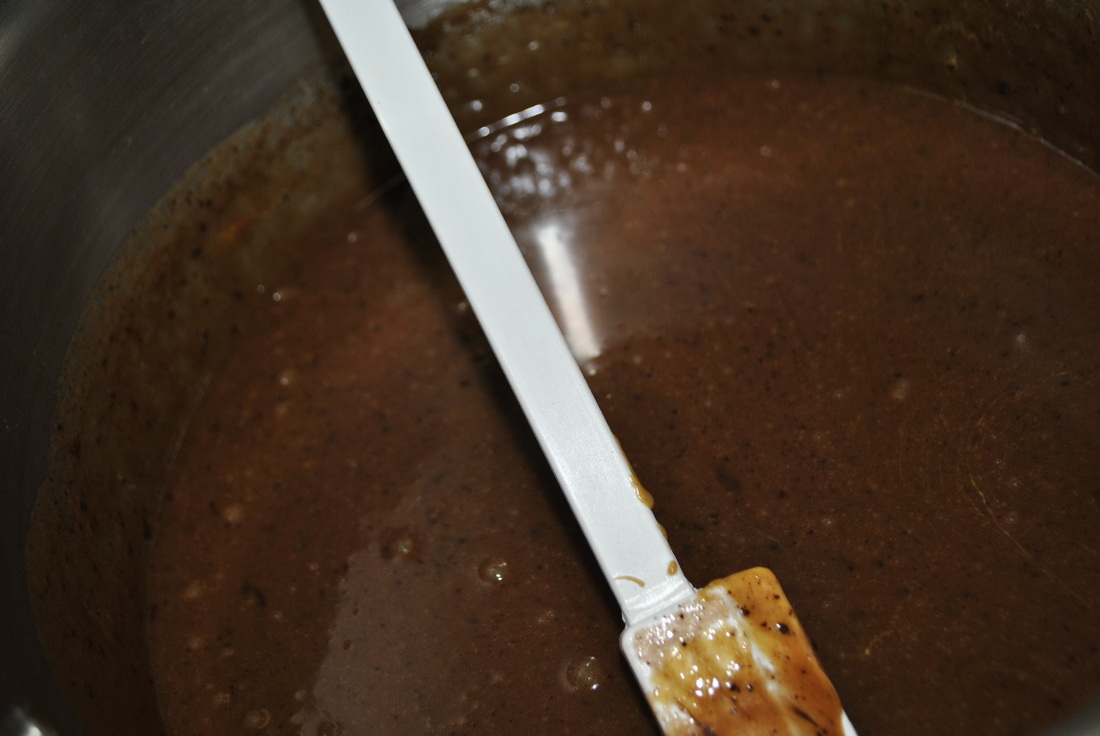
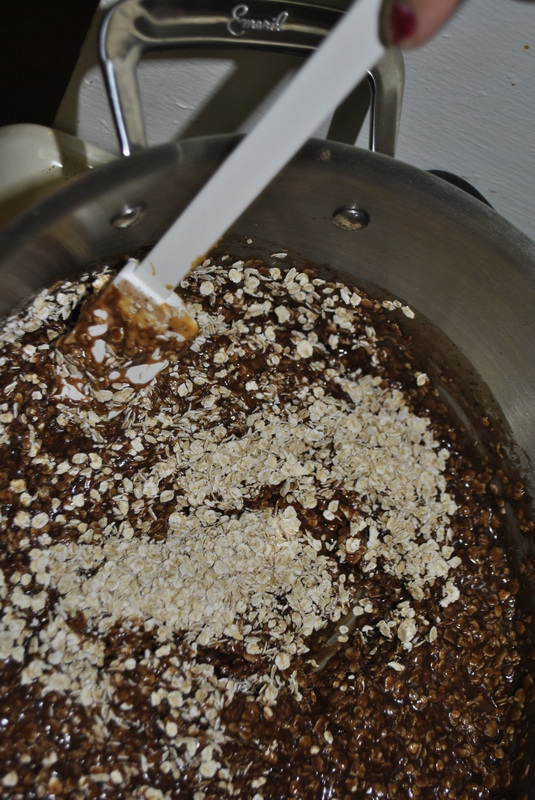
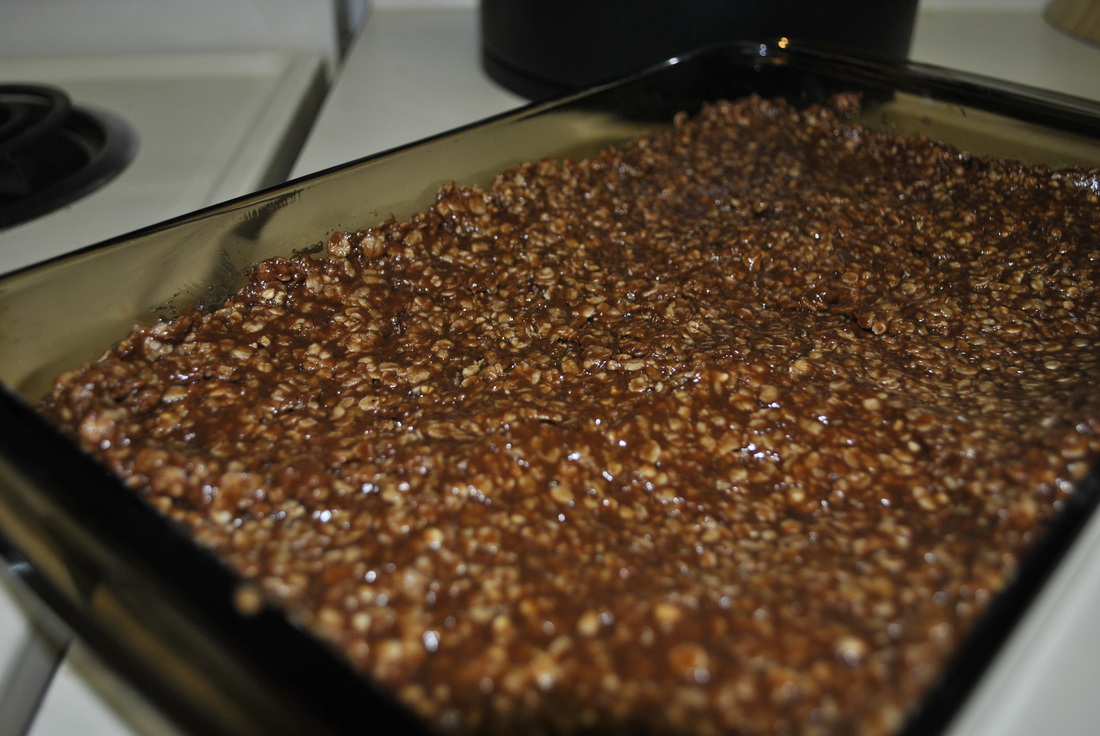
1. Add the first 4 ingredients(up to the cocoa) together in a saucepan until they boil. 2. Once boiling, let boil for one minute. 3. Remove from heat.
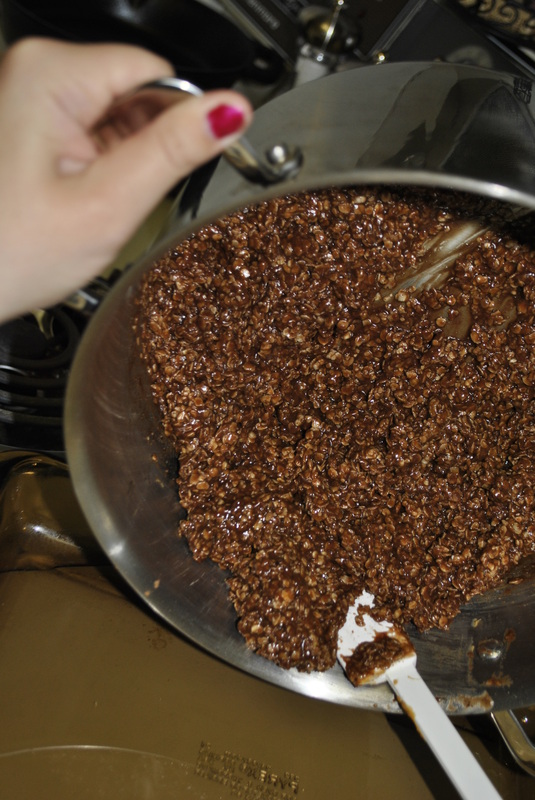
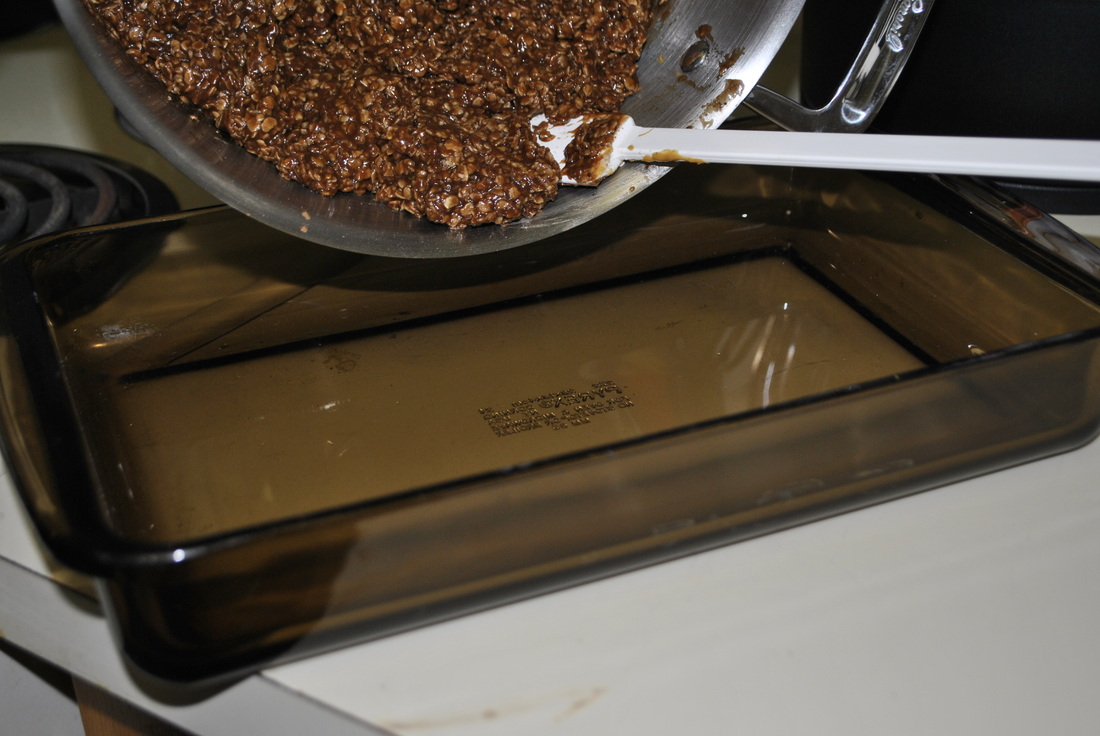
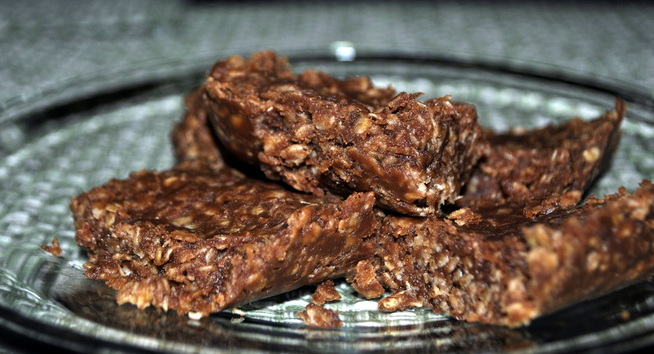
4. Stir in peanut butter and vanilla and stir until smooth. 5. Slowly stir in oatmeal flakes and mix well. Typically, you would then put dollops of the cookie mixture onto cookie sheets and let chill. Instead, i wanted to pour it into a pan and make cookie bars. And SO I DID! Once they cooled, I sliced them up and ate a few!! Hope you get the opportunity to make some and fill your childhood desire!! I know I sure did! If you happen to know any alternative recipes, let me know! I'd love to try them!
Thanks for traveling along!
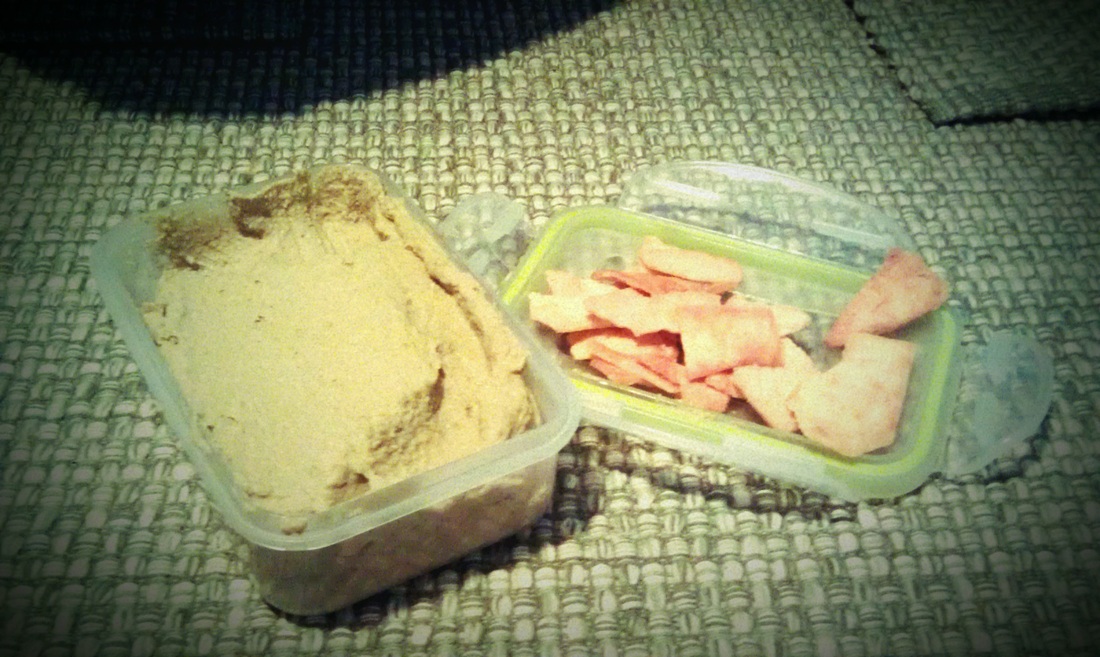
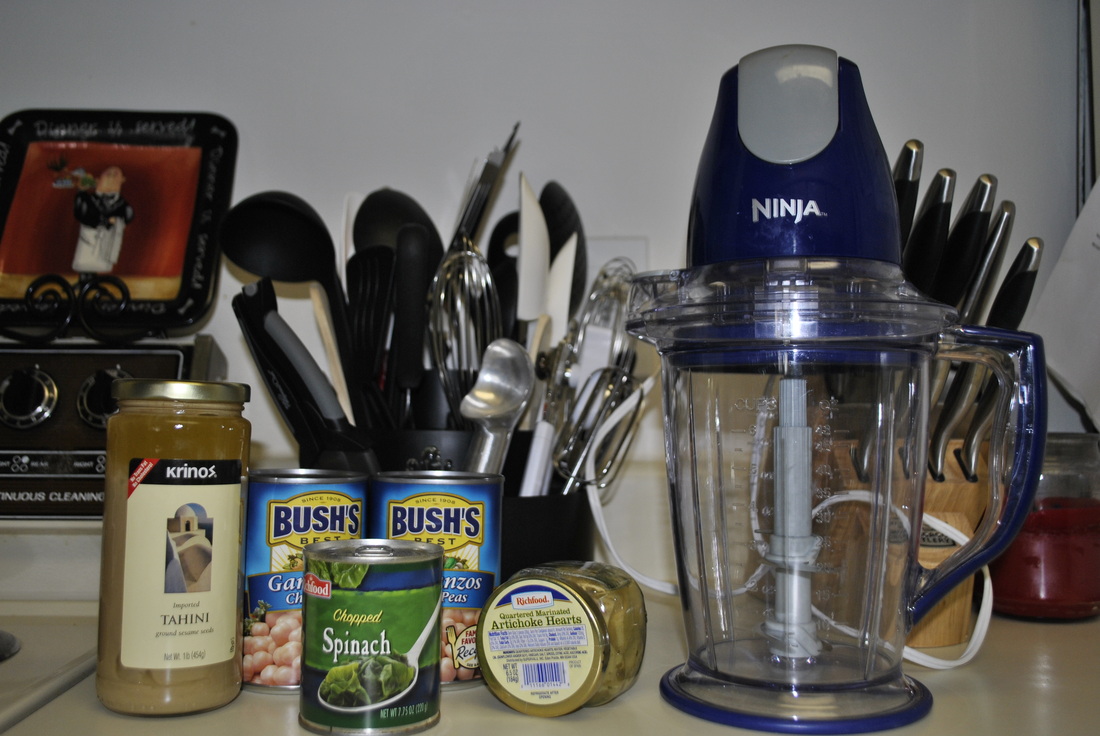
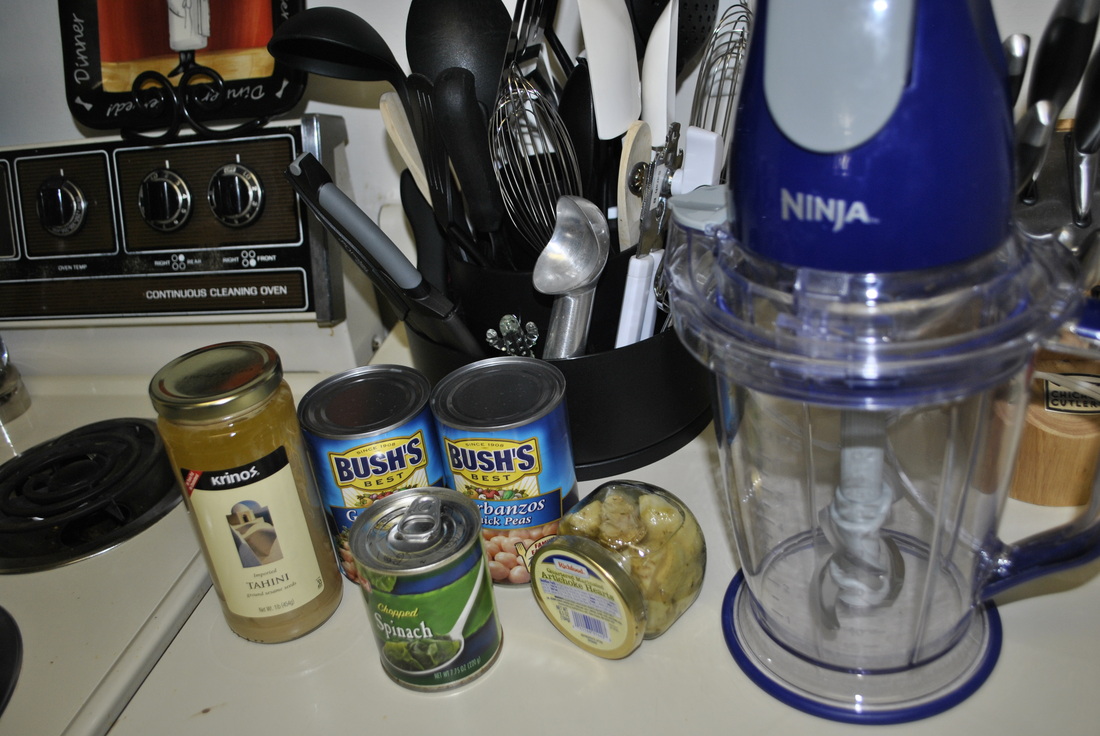
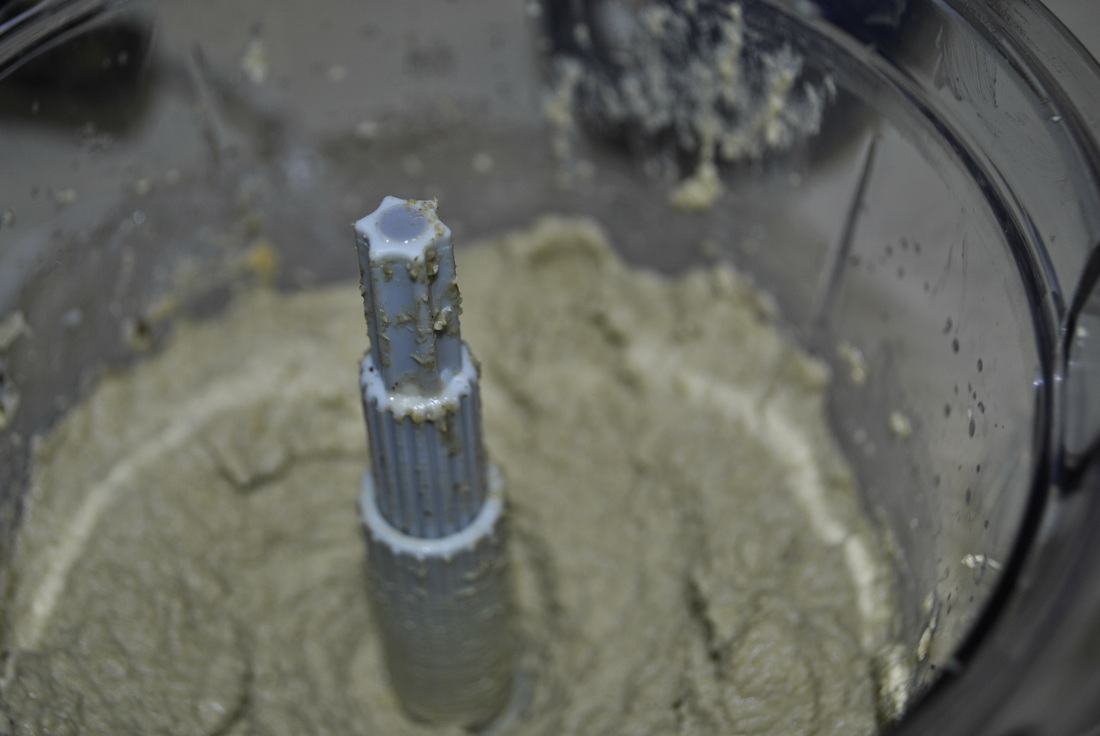
Again, I am going to blame Pinterest.com for my recent recipe. Not that I am mad, because I have a fairly awkward addiction to hummus. So when I found two decent recipes, I decided to create my own version to suit my tastes. I stumbled across Barefoot Contessa and Gimme Some Oven (cute, cute name!) and combined them. I did so because I was unsure how intense the complete spinach artichoke was going to be. I also made my version a "bulk" or double the recipe found on both of those sites. I did so mainly because hummus is a staple in my cute lunchbox. I am on the road during lunch and away from any power source, so I need something yummy and cold to pack with me. Hummus and pita chips generally do the trick! When I found out that you can safely freeze hummus, I decided there was no better reason not to make a double batch and freeze the extra! So without further adieu, here is my ingredient list and process! Humble Hummus
Ingredients:
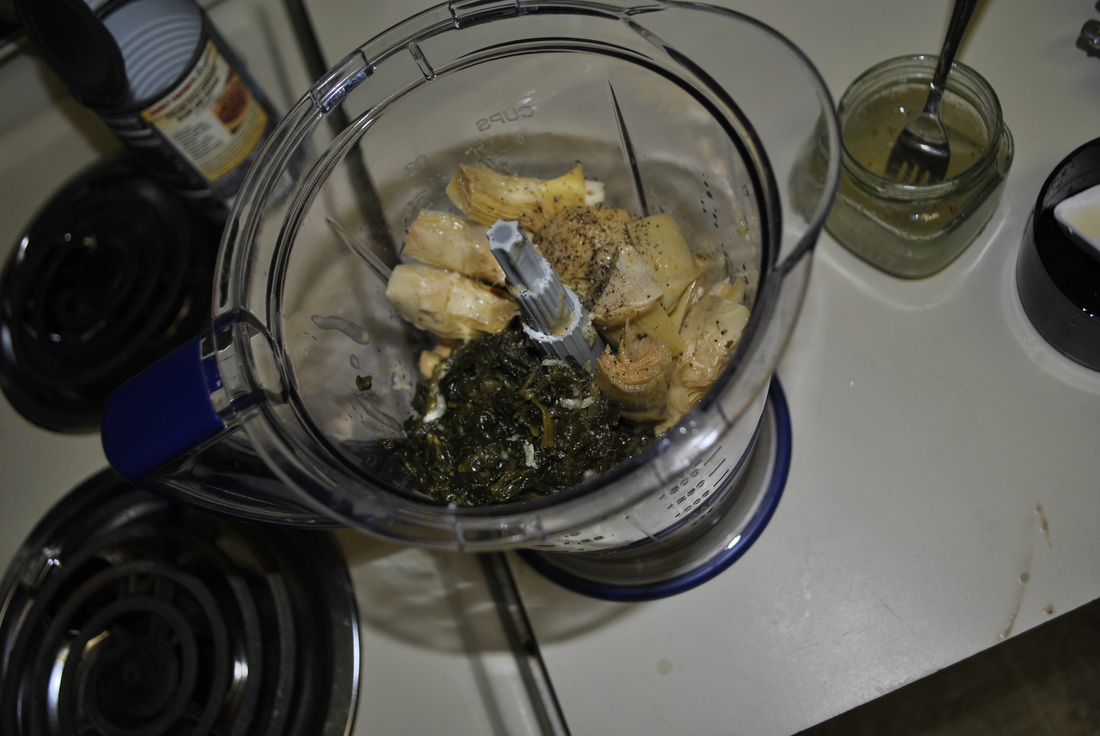
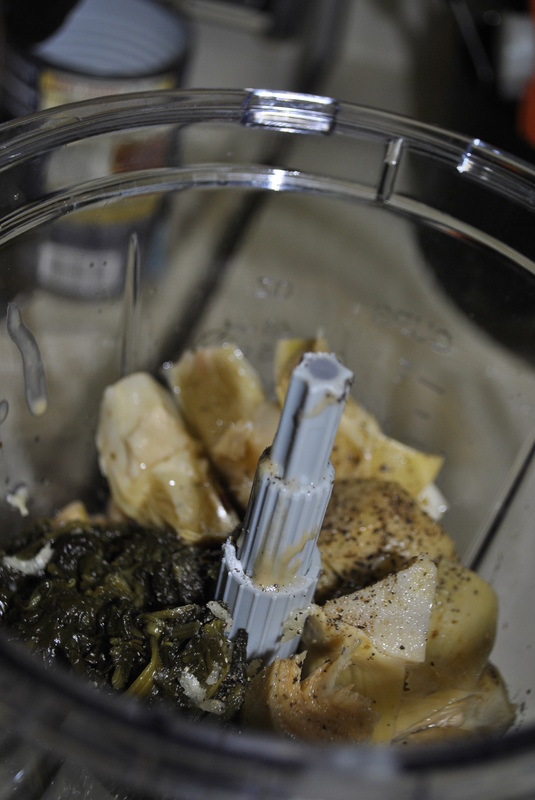
- 2 cans of chick peas, drained and juice on reserve (3 Tbsp.) (or "baby butts" as I grew up calling them) - 2/3 cup of tahini (sesame paste: which looks and has similar texture as natural peanut butter) - 1 baby can of chopped spinach (7.75 oz) - 1 can of marinated artichoke hearts (6.5 oz) ( I added approx. 1 Tbsp. of the marinated juices for fun) - 2 Tbsp. lemon juice - 3 garlic cloves, pressed - 1 Tbsp. olive oil - salt and pepper to taste (as you can see, my recipe is different than both recipes) Methods:
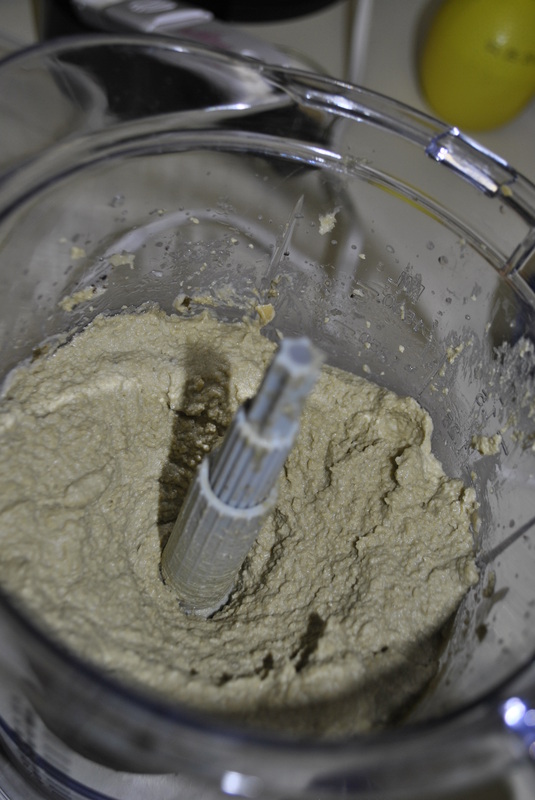
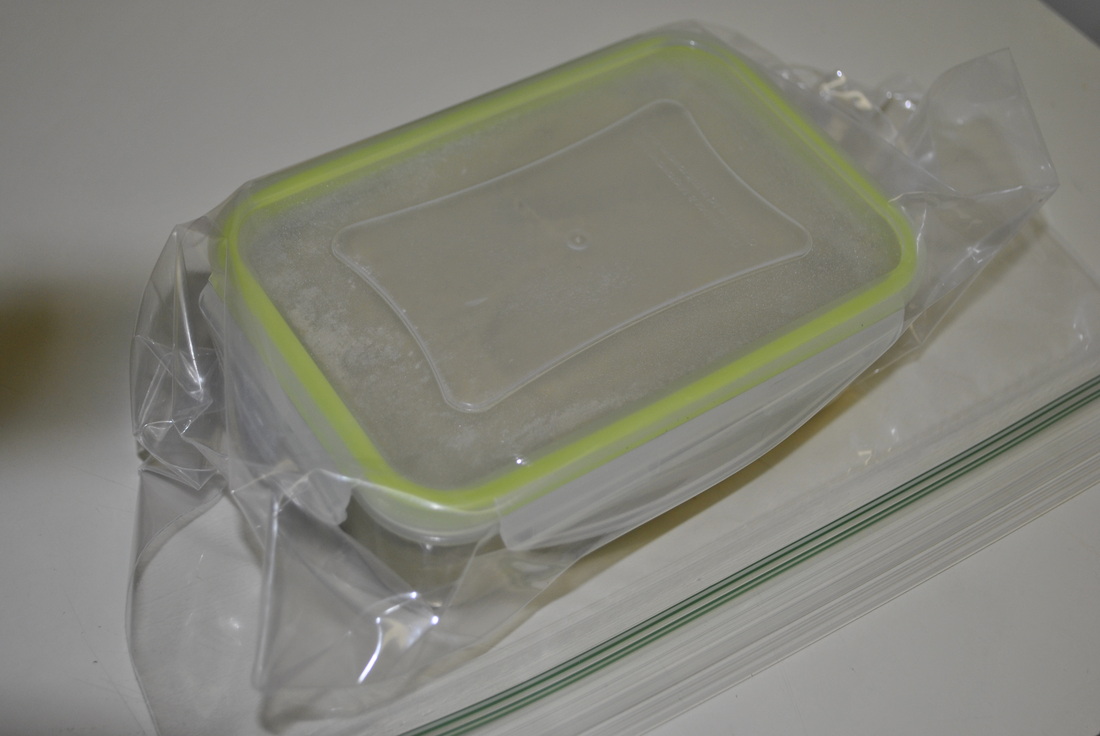
Put all the above in a food processor and prepare to make magic. :-) Blend together until smooth. If consistency is too thick for your liking, add more reserve liquid. From ^^ that ^^ To \/ This \/ Once my magic was completed, I got out my containers to store the humble hummus in. And since I wanted to freeze some, I packaged it up and placed into a freezer bag in order to add a second layer of protection against dreaded freezer burn. I may end up placing the other larger container in the freezer as well! Now, to break down how much this hummus really cost to make! Artichokes: $1.99 Spinach: $.89 Chickpeas: 2 x $1.09 = $2.18 Tahini: $6.59 bottle (I used approx 1/2, so my price for this batch = $3.29) Total cost = $8.35
Now, while this sounds more expensive than what you may buy in the store, remember how much this recipe yielded;
- two containers storing 17 oz
- one container storing 8 oz
So the recipe yeilded approx 42 oz. (about $0.19/oz)
Lets look at a grocery store's item
ValuMarket - Hummus of Sabra Classic Hummus, 10oz for $4.99 or $0.50/oz
LOOK WHO IS SAVING MONEY!! (as you read this, use both hands with thumbs up, and point to yourself!)
Now, Im going to enjoy me some Humble Hummus!
Hope this inspires you and you create your own version and flavors!! Let me know if you try something that is DELICIOUS!
Thanks for traveling along!
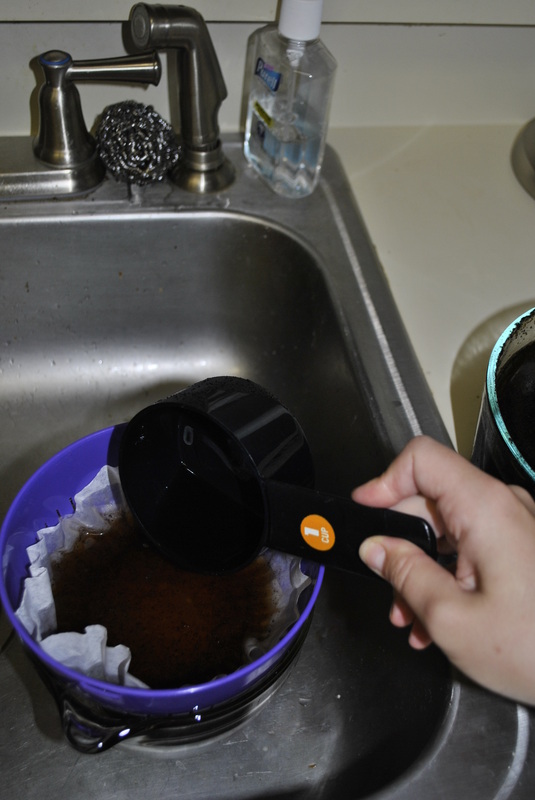
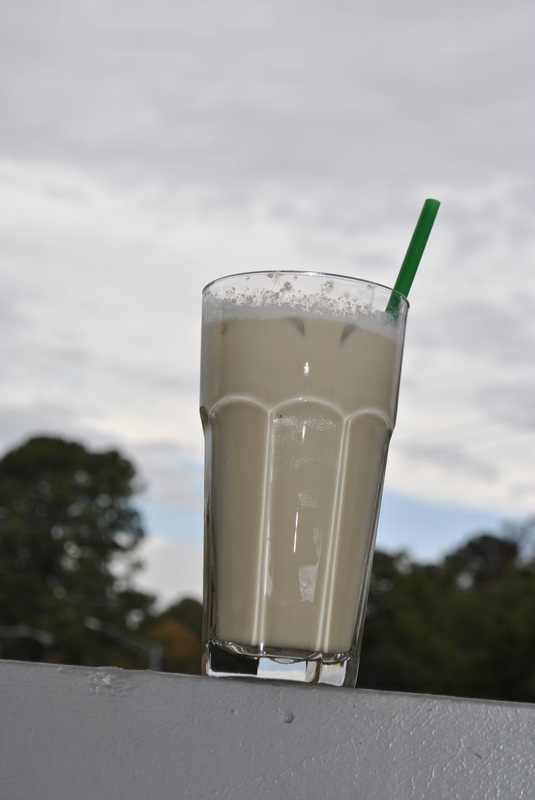
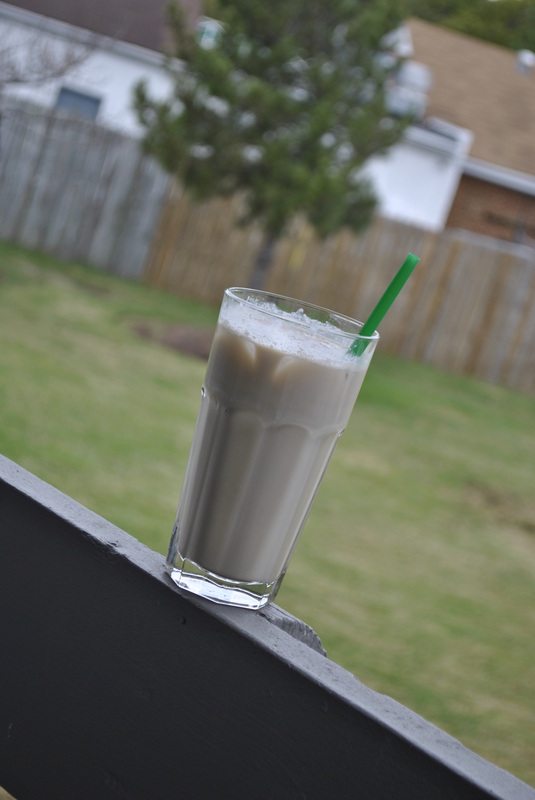
So one day I stopped at McDonald's and got a delicious little treat, otherwise known as the Iced Caramel Coffee. While I was drinking it, I decided I should find a recipe for it and learn to make this on my own...thus saving $$$$ :-) I stumbled across the webpage of Pioneer Woman in which she detail the process of making homemade Iced coffee. With the process in mind, I now had to go and get the ingredients (as I had NONE!). Off I went to Walmart to pick up Seattle's Best Cinnamon Bun coffee grounds, coffee filters and CoffeeMate caramel. Next step was to create my own version. So here is my step-by-step process. Hope you enjoy and maybe get inspired yourself! I started with a large glass pyrex container, poured a mound of coffee grounds in and topped those with water. I let that sit for at least 8 hours, although for my convienence, it seems they sit for longer. 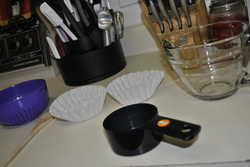 The items needed for making such a wonderous drink:
- strainer
- two coffee filters
- glass container to store in
- scoop of sorts
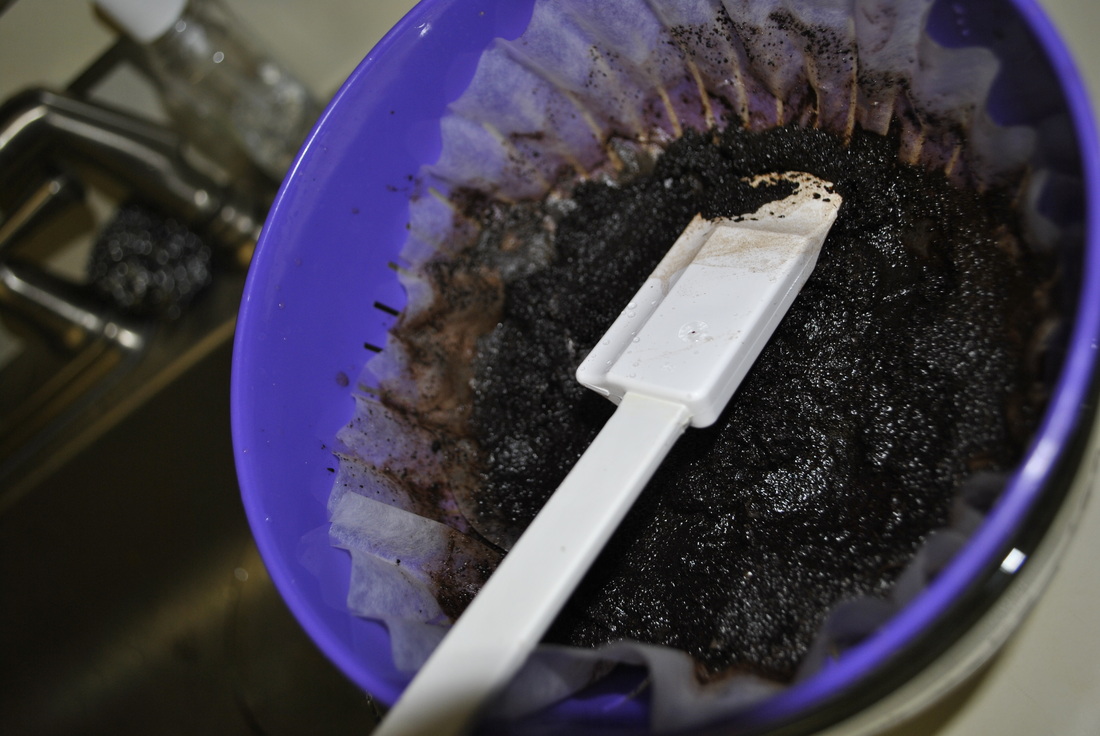
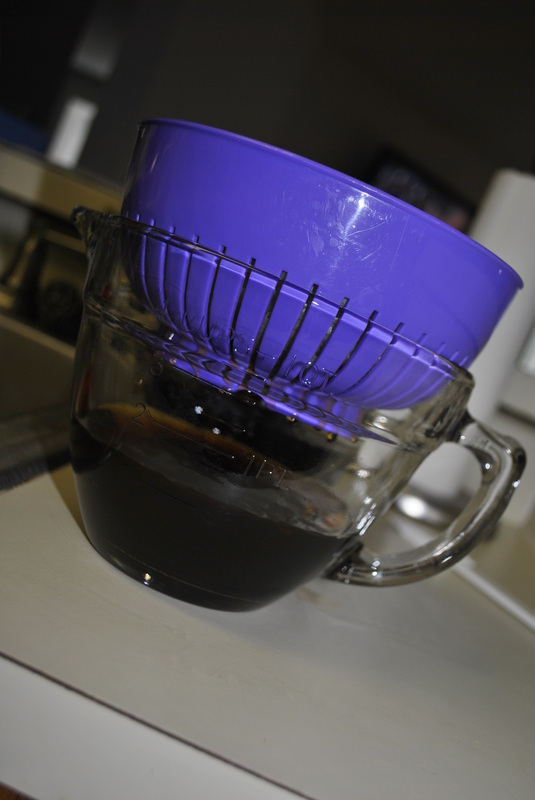
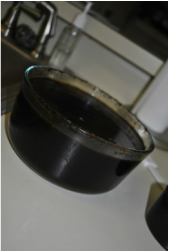 And then I reveal the coffee mixture, which I am sure is pure crack at this point.
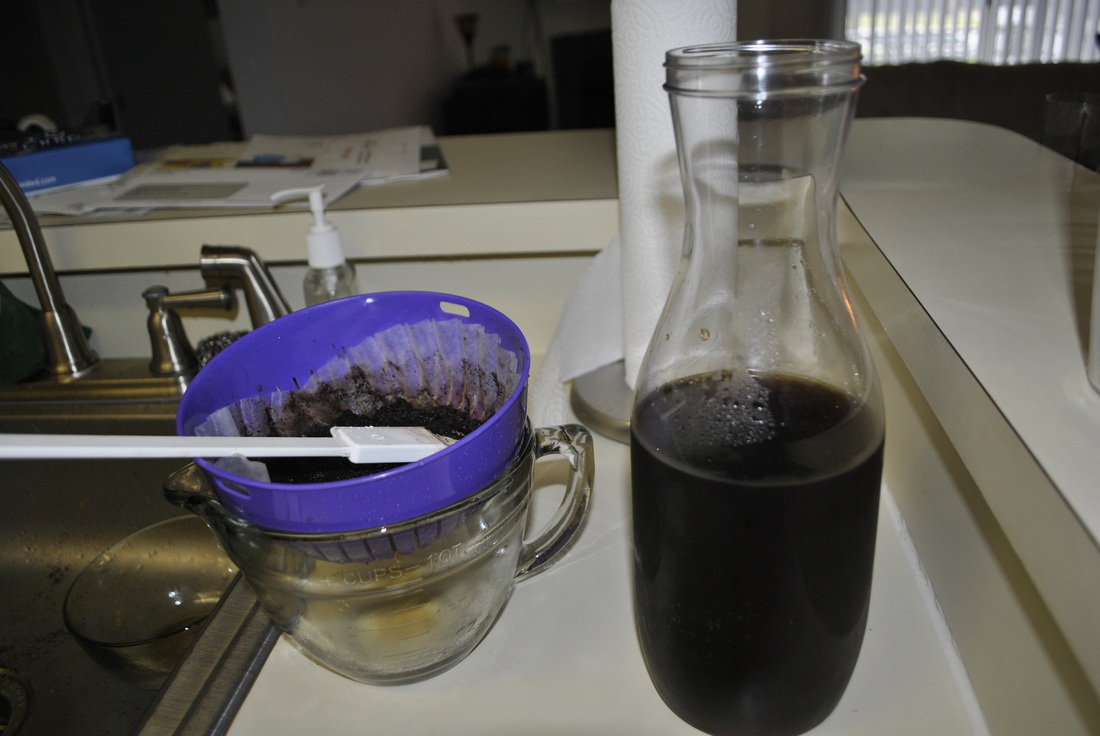
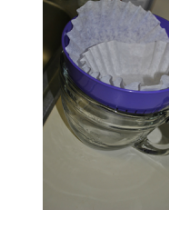 I then place the two coffee filters in the strainer and the strainer on the glass container. It is now ready to begin the magic!
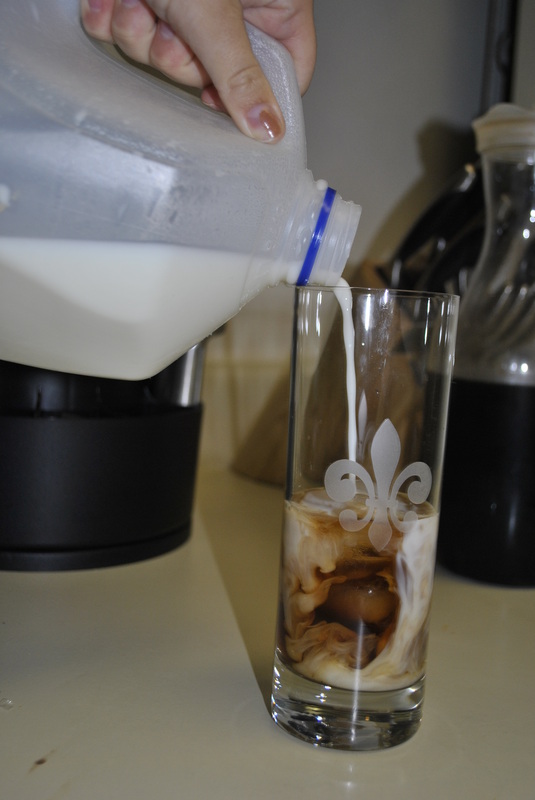
So now that I have filtered all the mixture through the strainer and coffee filters, I can begin to pour it into my coffee carafe! And from there...I can make my own iced coffee!
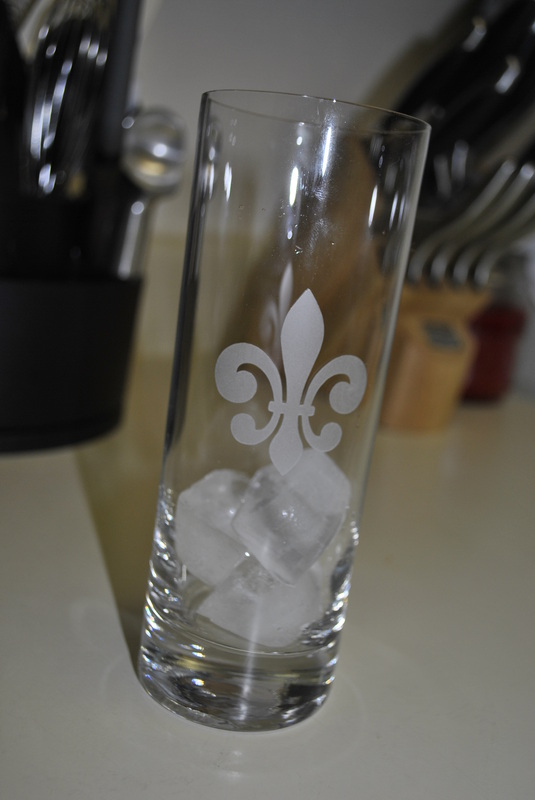
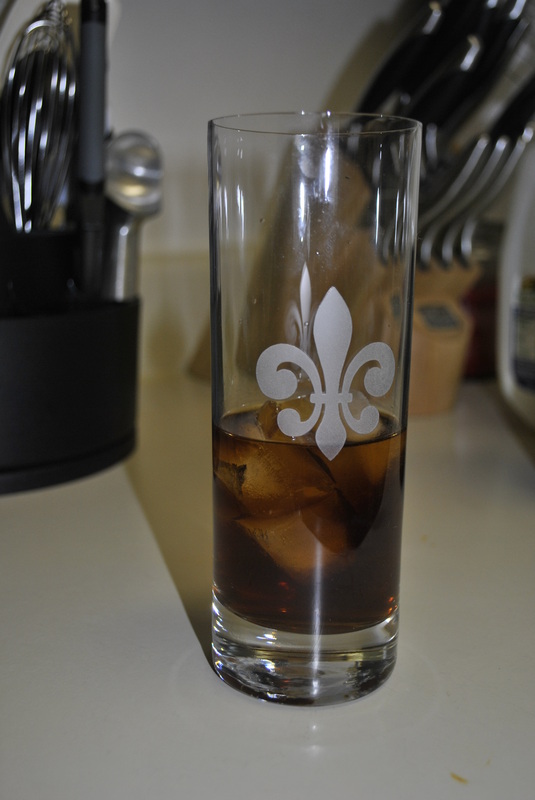
I pour the coffee concentrate atop ice cubes, then top off with milk and creamer to my desired likeness!
|


 RSS Feed
